Sunday, December 28, 2014

Phil'z Coffee

Photo #1

Philz Coffee had a soft opening for its newest location in San Mateo (Photo #1). It was scheduled to start at 11:00 am, and when I arrived at 11:10, the joint was already jumping. I was hoping for a crowd of coffee lovers, and wasn't disappointed.

Photo #2

There was laughing, drinking, and noshing on a variety of complimentary baked goods (Photo #2). Boy, that traditional Kouign Amann (I read the card) sure looked good, but the last thing any photographer needs is gooey frosting smeared all over his/her equipment. I gotta tell you, it wasn't easy saying "No, thank you", but sometimes you just gotta do it. But if a smile could tell a whole story, this one would write volumes!


Photo #3
Back to work. I noticed that I could bounce my flash off the wall behind me, so after adjusting the camera (1/160, F 2.8, ISO 800) I made a "hand selfie" to see how the light was behaving. I could tell that my current settings (1/160th of a second, F 2.8, ISO 800) that the ambient light was strong enough to come within one stop of proper exposure, as can see by the young man in the background behind the counter. The problem her is one of flash power: If I used wall bounced flash as my key light, it would add to the abundant ambient lighting, which would result in some blown highlights, as you can see on my hand. If I stopped my aperture down to F 4.0, the background would have gone darker, but I might not have had enough speedlight power to make the shot. I would also have lost some of the ceiling "twinkle" of the lights. Instead, I positioned myself so that the window light would illuminate Phil from the side, rather than from the front. Moving Phil farther from the window would have done the same thing. But this little tableau was playing out in front of me, so I decided to make the shot where they stood.

If you compare Photos #2 and #3, their eye level perspective allows for a good deal of the ceiling to show. I would have pursued this eye level perspective if I wanted to emphasize the architectural or decorative aspects, but instead I opted for an elevated perspective to include the barristas and the customers in the background. 

I made about six images of Phil, and selected the final image by a process of elimination. Remember that you really can't monopolize too much of your subject's time, especially when he's a businessman, working the room, chatting up the customers. If you're wondering about the sometimes unconventional framing, I'll explain that later.

Photo #4
I rejected Photo #4 because I failed to include is left hand in the image. After I previewed the shot, I suggested that Phil keep his hands a little closer together. By dumb luck, most of the "Philz" logo is visible on the cup. But the disconnected looks of the customers didn't help the image. I do like Phil's expression, as he appears to be singing "That's Amore", or a similar Dean Martin song. He has the look!


Photo #5
Photo #5 would be my ultimate choice. There are few (if any) distracting faces, and the one prominent bystander looks like she just got the punchline of the joke Phil just told. This grounded the image with a plausible story. I cropped the image to clean up the right third of the photo and managed to keep all of the important background. Unfortunately, Phil rotated the cup slightly, concealing the logo from the viewer. Again a reminder that I wasn't able to actually see the image at the moment it was taken.

Photo #6
I moved in a little closer for Photo #6, and as a consequence, brought his hands closer to the camera, making them appear much too large. Imagine a person whose hand spread was actually larger than his head. To top it off, the young lady was now checking her Smart Phone. Not a pretty sight.

Photo #7
For the last shot (Photo #7), I made it a point to get the logo on the cup clearly visible. I rejected the image because Phil is too low in the image. When I at tempted to crop the image, I lost all of the bystanders, and I still had a missing left hand. 

The big takeaway is a repetition of one of my rules to live by: A photograph is a gift. Sometimes you get what you want, and sometimes you don't. From my point of view, I got a pretty nice shot (Photo #5), one that everybody at the Journal seemed to like. So much so that the Editor made a special place for it on Page 6, one of the few times a photo like this appeared anywhere except the Community Section.

"Hail Mary": The "Hail Mary" position, camera held high overhead and pointed downward, is usually an act of desperation. Needless to say, you can''t look through the viewfinder, so you are only guessing where the camera is actually pointed. I'm sure some photographers get pretty good at this, but I just wasn't hitting the mark, as you can see in Photo #7. Had Phil been higher in the frame, the shot might have been saved, but alas, it was not to be. Photo #5 it was.

Sunday, December 21, 2014

200 Shots In One Hour

Photo #1
It's not what it sounds like. Thanksgiving at the Adult School is a festive event, a school-wide pot luck with food from around the world. Cuisines from every continent except Antarctica are represented. While for many it's a first encounter with a  roast turkey, it is still a bonding experience, a community builder in a classroom.

The idea behind today's shoot was to see how many images I could make in one hour. I was aiming for 200, which would mean that I was making a photo every 18 seconds. Once I accepted my own challenge, I had to decide what equipment to use.

Photo #2
The Camera: I needed a reliable setup that would be easy to use and would provide consistent results. Let's talk about he equipment first. The camera was a Nikon D40, (Photo #2), an entry-level DSLR introduced in 2006. To cut costs, Nikon removed in internal focusing motor and instead relied on the AF-S lens line which employed a focusing motor built into the lens itself. Second, the operations were heavily menu driven, eliminating the need for external button controls. Third, the Control Panel on the top plate of the camera body was eliminated, forcing the LCD panel on the back to perform playback and menu display functions. The mostly plastic 18-55 3.5 - 5.6 AF-S lens, the standard kit lens for entry level Nikons, is probably the least expensive zoom lens in the Nikon catalog. 

I chose this camera as an example of the sort of camera frequently found in the hands of the volunteer event photographers I often meet. The D40 and the subsequent iterations ( The D3xxx and D5xxx series) are similar in operation but offer more pixels, a real improvement. The basic kit lens is pretty much remains the same, and is perfectly adequate for this kind of shooting. 

The Flash: From here out, my selection of the bits becomes more diverse. The flash is a Vivitar 283 modified to use a flash tube that is parallel, not perpendicular to, the lens axis. When used with a parabolic reflector,  hot spots on the subject's face are reduced. My particular unit has a 1/4 CTO filter to improve flesh tones. The 283 is not a TTL flash, but instead utilizes a built-in forward-facing sensor to dollop out the proper exposure when used with a specific ISO/aperture combination. Because of the high triggering voltage typical of Vivitar flashes, a Wein Safe Sync was installed between the hot shoe and the flash to protect the camera from being "fried". A PC/Household cable was used to connect the two because the Vivitar has a Holly aluminum replacement foot. Because the Safe Sync does not have the Speedlight Present contact, the outfit could synchronize the flash at almost any speed. Nearly any flash can be used for this type of work, as long as the trigger voltage is low enough. My use of the bare tube modified Vivitar was a matter of convenience.

The Bracket: The final key component of this system is the flash bracket (QRS-35, now discontinued)  made by Custom Brackets. You can see that it raises the flash well above the lens axis, giving more pronounced shadows and softer highlights. If I was only making a few images, I wouldn't bother with the bracket and would simply hold the flash aloft with my free hand. But with my goal of 200 shots in one hour, working without a bracket would quickly get pretty tiring. Flash brackets have fallen from vogue in recent years, and can be found at camera shows at very reasonable prices. The best ones center the flash directly over the lens, and some allow the camera to rotate while maintaining the flash's location high over the camera.

The QB (Custom Brackets) are expensive, but they make a quality product. The are manufactured from machined aluminum with brass screws when needed, and are rugged. You can find brackets that are much cheaper, but the quality isn't any where near that of the QB. Stroboframe brackets are excellent, too.


Photo #3
 The D40 shares the "sync at any speed" quality with the Nikon D70s and the D50.  This allows me to sync at almost any speed, making it well adapted to shooting indoors and out. In Photo #3, the camera was set to 1/500, F 5.6, ISO 200. With my subject in the shadow of the buildings behind me, the flash was the sole source of subject illumination, so the existing light on my subject's face could be ignored.


Photo #4
Unfortunately for me, the freedom from thinking about synchronization speed lead to inattentiveness on my part. In Photo #4 I forgot to set the shutter speed my shorter "outdoor" setting after stepping out from an indoor venue. As you can see here, the background was a bit "hot". The exposure setting for this shot was 1/200 of a second with the aperture remaining at 5.6 and the ISO still at 200. Luckily, the subject is still well exposed, and the bright overexposed background could be ignored for this shot.

Photo #5
Backgrounds: Here's a quick rule when working under these "run and gun" situations: Keep your subjects as close the the background as you can. This will keep the exposure levels reasonable close to those on your subject. In Photo #5, the subjects are just a few feet from the background wall, and while not ideal, the results are acceptable. Watch out for a background that is angled from the lens axis. You'll see how the light falls off from camera right to camera left in this shot.


Photo #6
In Photo #6, you can see that the background is some distance away, and is much darker than Photo #6. Keep in mind that when working in a room as it was in these shots, you can't always move the subject closer to the background. Here, my sitting subject was close to the middle of the room. The exposure for these two shots was 1/125. No attempt was made to take the ambient light into account, mainly to prevent color contamination from the existing fluorescent. Sure, one could have filtered the flash to match the existing light but then I'd have to try to balance the two sources (ambient and flash) which would consume valuable time.


Photo #7
Glare: Glare from the background is almost inevitable. In this shot, you can see a sort of "glow" on the whiteboard background. If the camera is perpendicular to the background and the camera held perfectly level, the "hot spot" will appear in the exact center of the image. Any deviation from the perpendicular will alter the location of the hot spot. As a general rule of thumb, keep your subject centered in your viewfinder and your lens axis as close to perpendicular as possible.
Photo #8

You can see in Photo #7 that the hot spot is mostly covered by the subjects. The slight downward angle of the shot moved the glare spot 

In Photo #8, it is complete concealed by the subjects and the (slightly) high camera angle. 

In the end, I made nearly 200 photos, but by the time I culled out the clunkers, I wound up with 80 usable images, and I did it in one hour. And using direct flash allowed for fast recycle times and relatively long battery life. Truly, an easy shooting day!

Sunday, December 14, 2014

Genius Dual Speedlight Mount

Photo #1 ©Tommy Huynh
Check this out: Tommy Huynh from San Antonio, Texas, is a genius. He created a simple and versatile dual flash mounting set-up (Photo #1) using readily available bits from your local camera store. Click here for a parts list a details on how you can assemble one of these things for yourself.

This adaptation has the versatility of axial rotation of the mounted flashes because each is mounted in its own ball head. This adds to the cost, but allows flexibility in the orientation of the flash sensor eye if used in the SU-4 or optically triggered remote mode. This would obviously become academic if a radio controller/remote system is employed.

Photo #2
My own solution (Photo #2), while cheaper, requires some small use of power tools to cut and drill the aluminum channel stock needed to construct the unit. In its current form, my unit works best with some form of line-of-sight communication between flash and camera. Its 90 degree orientation allows for two Nikon SB-800s to have their sensor eyes facing forward into an umbrella, allowing it to "catch" any light signals from the camera. It's also much cheaper. However, it doesn't allow for on-axis alignment with the umbrella, which may (or may not) be a problem. Remember that nearly all umbrella brackets angle the umbrella shaft upwards so that the flash beams and the center of the umbrella converge at the center. 

Depending on how  handy you are, either of these solutions can be made to work. I just thought that Mr. Huynh's solution was brilliant!

Sunday, December 7, 2014

Open Wide! Sensor Cleaning At Home

Having a large family of Nikon D70 bodies includes insuring their overall health. I bought as many as I did because their purchase price dropped below what I would have pay to have one repaired. By having a fleet of these inexpensive (but capable) camera bodies means that when when one no longer functions, I can simply sell it for parts, and go to my equipment closet and draw out another.

There has been a lull in Journal assignments and a quick turn-around time for sensor cleaning at my preferred camera retailer, so I started to bring in my second string, then my first string, bodies in for cleaning. In all I had five bodies in my combined first and second tier bodies, but my third tier D70s needed some attention. 

I described a relatively simple system for checking your on DSLR's sensor for dust spots in this post. For my D70 and D70s bodies, I decided to check them with my Sensor Scope and found that nearly all had some dust on their sensors. At $50.00 per body, I was looking at a sizable cleaning bill if I were to clean  every camera body. Faced with this potentially large expense, I decided to explore cleaning the sensors myself.


www.delkin.com
For many years, manufacturers discouraged individuals from cleaning their own sensors. However, if you checked You Tube, you could find clips, submitted by Japanese photographers, showing hobbyists cleaning their own sensors using readily available sensor cleaning kits. I was a little hesitant to do this myself, being content to use my Sensor Scope to look for dust, and delegating the cleaning task to a professional when enough dust was found. But is seems that the new breed of Interchangeable Lens Compact (ILC) cameras has prompted dealers to encourage the do-it-yourself approach, perhaps because the sensor was more easily seen and accessed when no mirror was present, or because these cameras are more likely to be used by amateurs who wouldn't pay for a professional service anyway. In fact, the cleaning supplies were prominently displayed by the display case reserved for ILC cameras and accessories. I spoke briefly with the sales person, and determined that for my Nikon SLRs with APS sensors, I would need to purchase the proper sized sensor swabs and some cleaning solution. I walked out with a bottle of Eclipse Optic Cleaning Fluid and a box of 12 #2 sized Sensor Swabs from Photographic Solutions.   The swabs come in three sizes: Size #1 is for micro four-thirds, #2 is for APS sized sensors, and #3 is for full fame cameras. One caveat from their website: Only ECLIPSE Optic Cleaning Fluid may be used to clean traditional CCD, CMOS and Tin Oxide sensors. Now I'm the kind of guy who reads the instructions before starting an unfamiliar project, so I'll simply say that if your camera is NOT listed on this chart, you shouldn't use this method of cleaning. You can see a detailed video on how to clean the sensor. Just click here to see exactly how it's done.

On final note: The instructions clearly state that you may need as many as four swabs to get your sensor clean (the swabs are used only once - one left stroke and one right stroke). I would still suggest that you get a Sensor Scope (or a similar product) and use it to check your sensor after each swabbing. And don't forget that a blower like the Giotto Rocket Blower, may be all you need to to blow away the loose dust. The blower, besides having a cool "rocket" shape, has an internal filtration system to prevent it from sucking in airborne particles and blowing them onto your sensor, in important feature. You might just find out that a little "whoosh" from your Rocket is all you need...for now.

Sunday, November 30, 2014

Veteran's Day 2014

Dodged a bullet on this photograph. The Editor In Chief wanted an image that "said" Veterans Day, one with flags on grave markers, to run on Page 1 of the November 11 issue of the Journal. I found this photo (Photo #1) among the photos I made during Memorial Day six months earlier, and submitted it. It succeeded in getting the message across. Thinking back, there is an historical difference between the two events. Veteran's Day was originally called Armistice Day, and is always celebrated on the 11th day of the 11th month of the year which coincides with the cease-fire that ended World War I. On the other hand, Memorial Day, formerly called Decoration Day, was created after the Civil War to commemorate the dead of both sides.

Photo #2
I like these two events because I get a chance to use my longest lens, a Sigma 170-500 mm lens. Thankfully, it has image stabilization, and while the lens is heavy, noisy, and slow,  it produces reasonably sharp images, certainly good enough for anything I do for the paper. It allows me to "stalk" a photogenic subject, zoom in nice and tight, and wait for something interesting to happen. This veteran was speaking with somebody at the left edge of the photo (Photo #2).  He never backed away so I never got a really clean shot. I left them in so that the Editor could crop the image in any way they wished. Incidentally, I was not asked to photograph this event, so there's always the chance the photo won't be printed.

Photo #3
Assignments like this one force you to think about lighting problems encountered in the field. In Photo #3, a quick re-adjustment to the camera (ISO 200, Shutter Priority mode set to 1/250th of a second, exposure compensation set to -0.7 stops yielding an aperture of F18, on camera flash compensation -1.7 stops. Shots like this are a reminder that when shooting with a flash, one mustn't forget the contribution of ambient light to the shadow side exposure. I've noticed than when I underexposed the ambient (necessary to get some details in the clouds) and the flash output, I started to get better results. "Fill flash" is great for the shadows, but can potentially burn out the highlights. In this shot, the on-camera flash isn't particularly creative, but it got the job done.

Photo #4
I was pleasantly surprised by this photo (Photo #4). Open shade often produces "racoon eyes" because the sky directly above the subject casts a shadow in the sockets. However, this speaker was standing under an awning, so she is protected from the light coming directly  from above. This gives some direction to the light that does hit her face. You can see a very distinct shadow below the chin. I had been told that photographing under overhead awnings would produce some very attractive lighting, but this is the first time I'm made a photo where I actually utilized it. Exposure information: 1/100, Aperture set to F 5.6, Aperture Priority, -0.3 Exposure Compensation, and a white balance preset of Overcast. 

This final shot (Photo #5) wasn't submitted, simply because I couldn't be absolutely sure that it was a tear being wiped. Also, there is no flag in the background, which I felt was a very important visual element. His friend, seated at his right, was also a bit distracting, another reason for scrubbing the image. One exposure note: These veterans are facing directly into morning sun. There was some high clouds which helped to fill the shadows. There was just enough haze to allow the audience to look into the sun without squinting. 

My submitted photo did not run in the 11/12 edition, and may not run on Monday in the Community Section. Still, the assignment was a lot of fun, and I added something to my lighting bag of tricks. I thought that the natural light shot under the awning was a real eye-opener for me, and a reminder that natural light should be my first choice. I guess I've gotten too accustomed to working indoors, so it did me some good to get outside from time to time.

Sunday, November 23, 2014

Nothin' But Blue Skies...


Photo #1

Photo #2
In my last post, you were introduced to a complimentary white balance and corrective gel pair that could be used to create some unusual color effects. In that post I demonstrated how the combination of a 30M lens filter and a “Full Green” correction gel can yield a magenta toned sky with  normal flesh tones. If you look at the illustration (Photo #1), you can see the filter/flash pairing of the filter and corresponding gelled flash at the top. I use the term “normal” with the admission that some color adjustment in post processing may be required to produce an acceptable image (Photo #2). I gave credit to Joe McNally in the last post, and will here paraphrase the explanation he gave in his book, "The Moment It Clicks". To wit: When photographing in mixed light sources, concentrate on the skin tones. In his example, the room had a variety of light sources, but chose 30M/Full Green combination for a reasonable rendition of flesh tones illuminated by the speedlight, and a close match to the room's ambient florescent lighting. The little existing daylight and incandescent lighting was thrown under the proverbial bus.

Photo #3
For this second variation (Photo #3), my goal was a twilight sky rendered deep blue. In this case, the coupled pair would have been an 80a filter and the CTO (aka Color Temperature Orange) correction gel on the flash, as seen in the lower half of Photo #1. Had I been using daylight film 30 years ago, I would have gone with this filter and gel combination. Today, I simply used the camera's Incandescent White Balance Preset instead.

Both of the full Green and CTO filtration were/are available as acetate gels for the Nikon SB-800, and as plastic snap-on filters for the SB-700 and SB-910. The SB-900 was designed to use an acetate gel mounted in a clear snap-on holder. But when I learned that the SB-910 snap-on incandescent and fluorescent filters fit the SB-900, I bought several sets.

Just a quick reminder: Full Green filtration converts a daylight balanced light source (your flash) to a simulated fluorescent lightsource, and the CTO converts a daylight source to ""incandescent". This can be a slippery slope, because there are several interpretations of the proper color of an incandescent light source, each with a tint on the redness scale. To quickly summarize, "redness" is measured in Kelvin degrees, and the higher the degree level, the bluer the tint. For example: There is the endangered incandescent light bulb (2700-3300 degrees Kelvin), the Type A (movie) Photoflood (3400 degrees Kelvin), and the Type B Photoflood (3200 degrees Kelvin). Daylight is usually pegged at around 5600 Kelvin degrees.
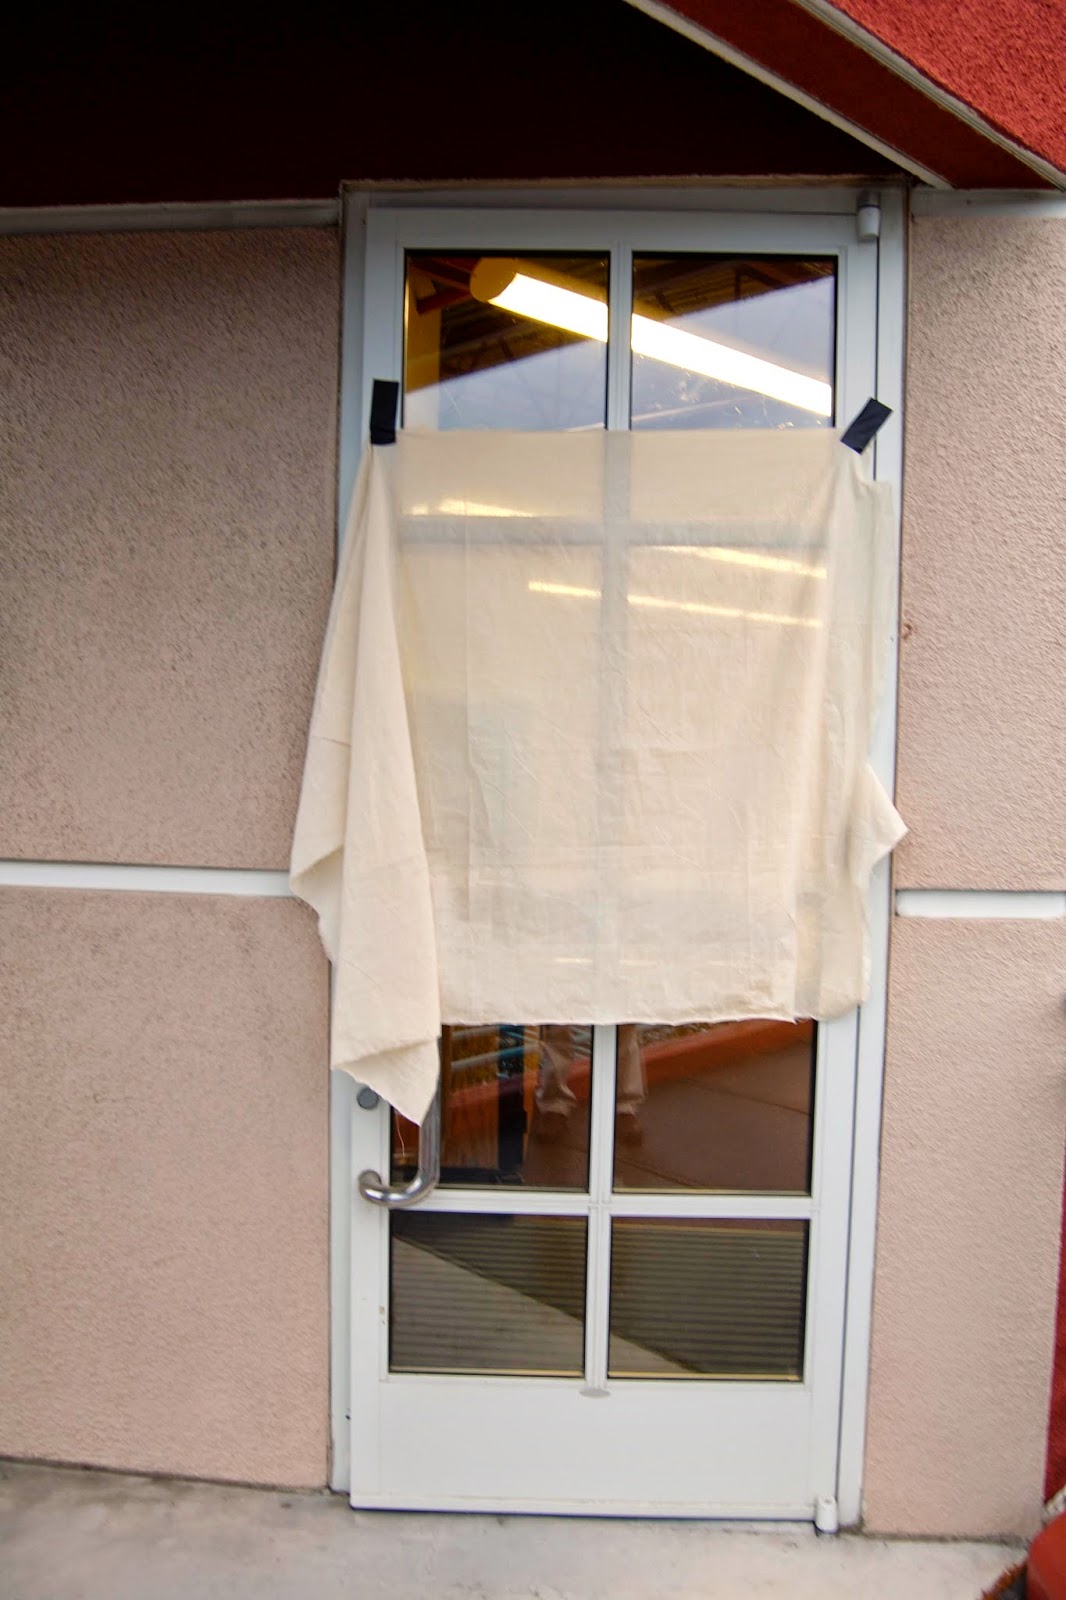
Photo #4
Improvised Bounce Surface: I had planned on making a quick outdoor shot using on-camera bounced flash, and to take advantage of the drizzly evening sky. Since the alcove outside of my office building is painted a pale shade of pink, light bounced of the exterior would give the subject a definite red tint. To remedy this, I gaffer taped a piece of unbleached muslin, a readily obtainable fabric, to a glass door for use as a bounce surface. The pale beige color gives the bounced light a bit of warmth which never hurts when photographing people.  You can see the muslin taped to the door here in Photo #4.
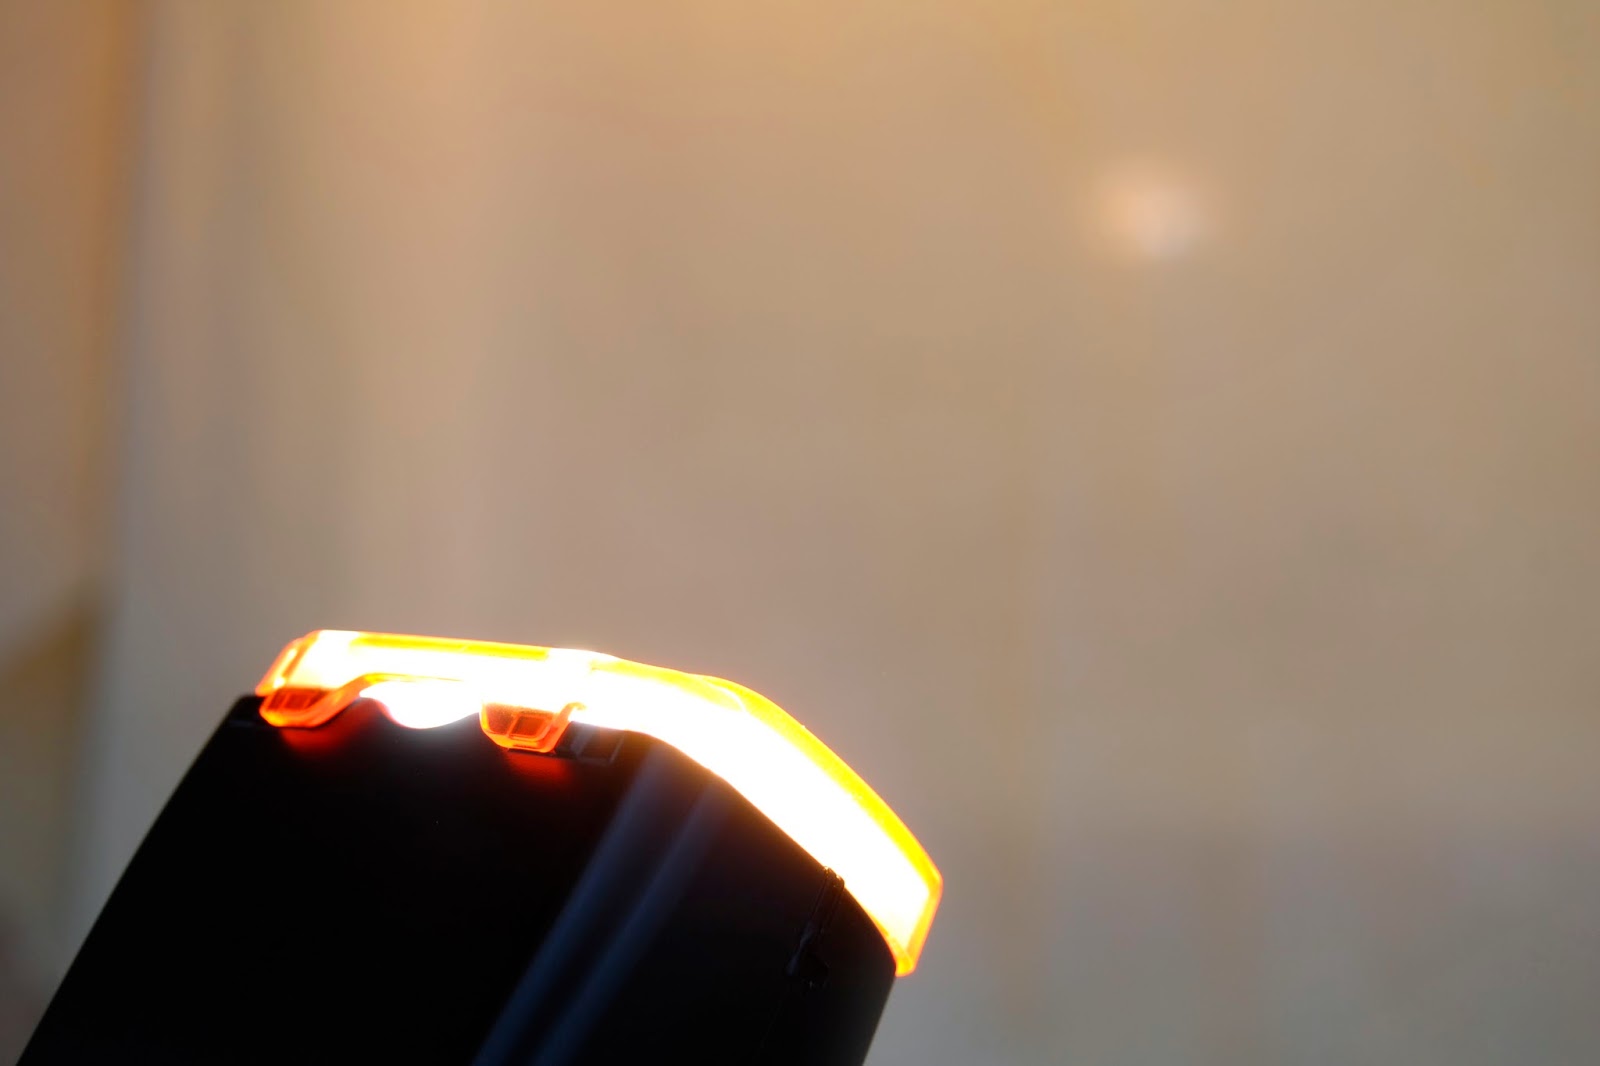
Photo #5
I decided to try an angled on-camera bounce flash instead of my normal “point to the rear” selfie lighting. Because the flash head was set at an angle, raw direct light will often spill from the edges of the flash head, or in this case, from the edges of the filter, as you can see in Photo #5. The speedlight is aimed at the muslin at same angle it would be when I actually made the photo. The quick fix was to improvise a “gobo” (GO Between Optics). Gobos can be anything that goes between the light source and the camera. 
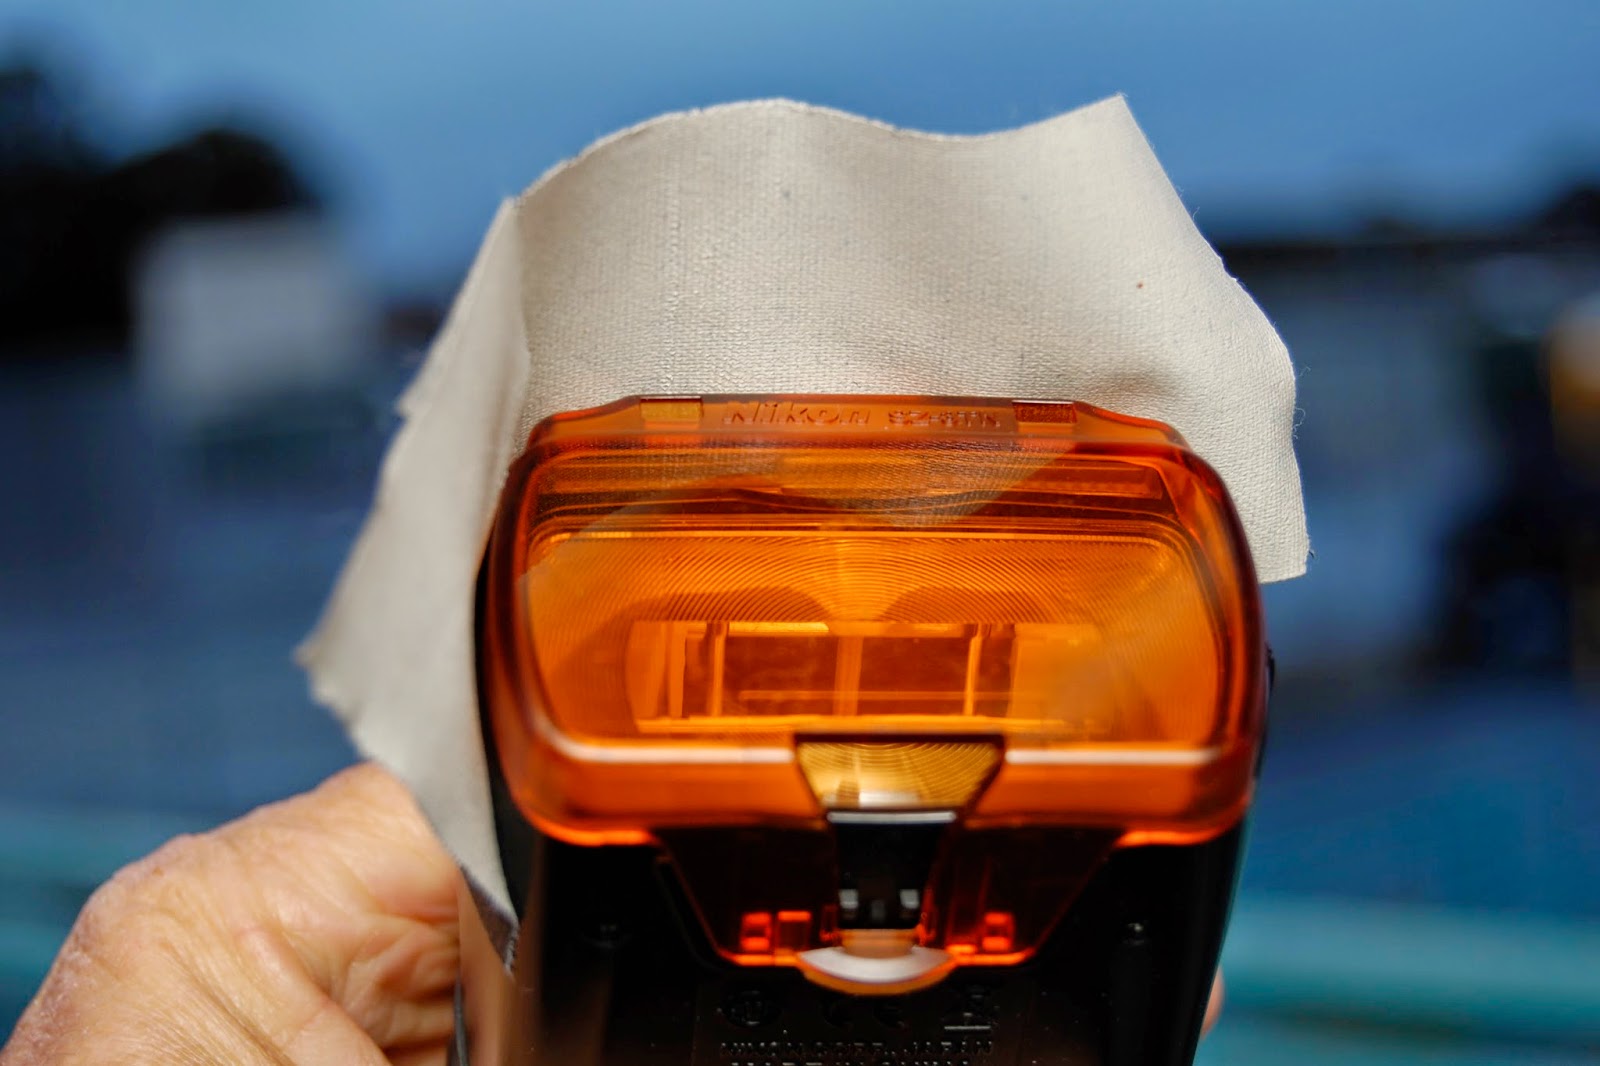
Photo #6
You can see in Photo #6 that I made a shade with wide gaffer tape. It covers the two surfaces that could be seen from by the subject, and therefore might have an effect on the final photograph. In Photo #7, you can see that it prevented any direct light from spilling onto the subject. Notice that direct light no longer "leaks" onto the subject which allows the subject to enjoy the uniform warmth of the fabric. The tiny hot spot in the middle is the reflection of the flash from the glass behind the muslin, which has no impact on the image itself. Now I could have covered the window with cardboard to prevent the reflection, but that's going TOO far.
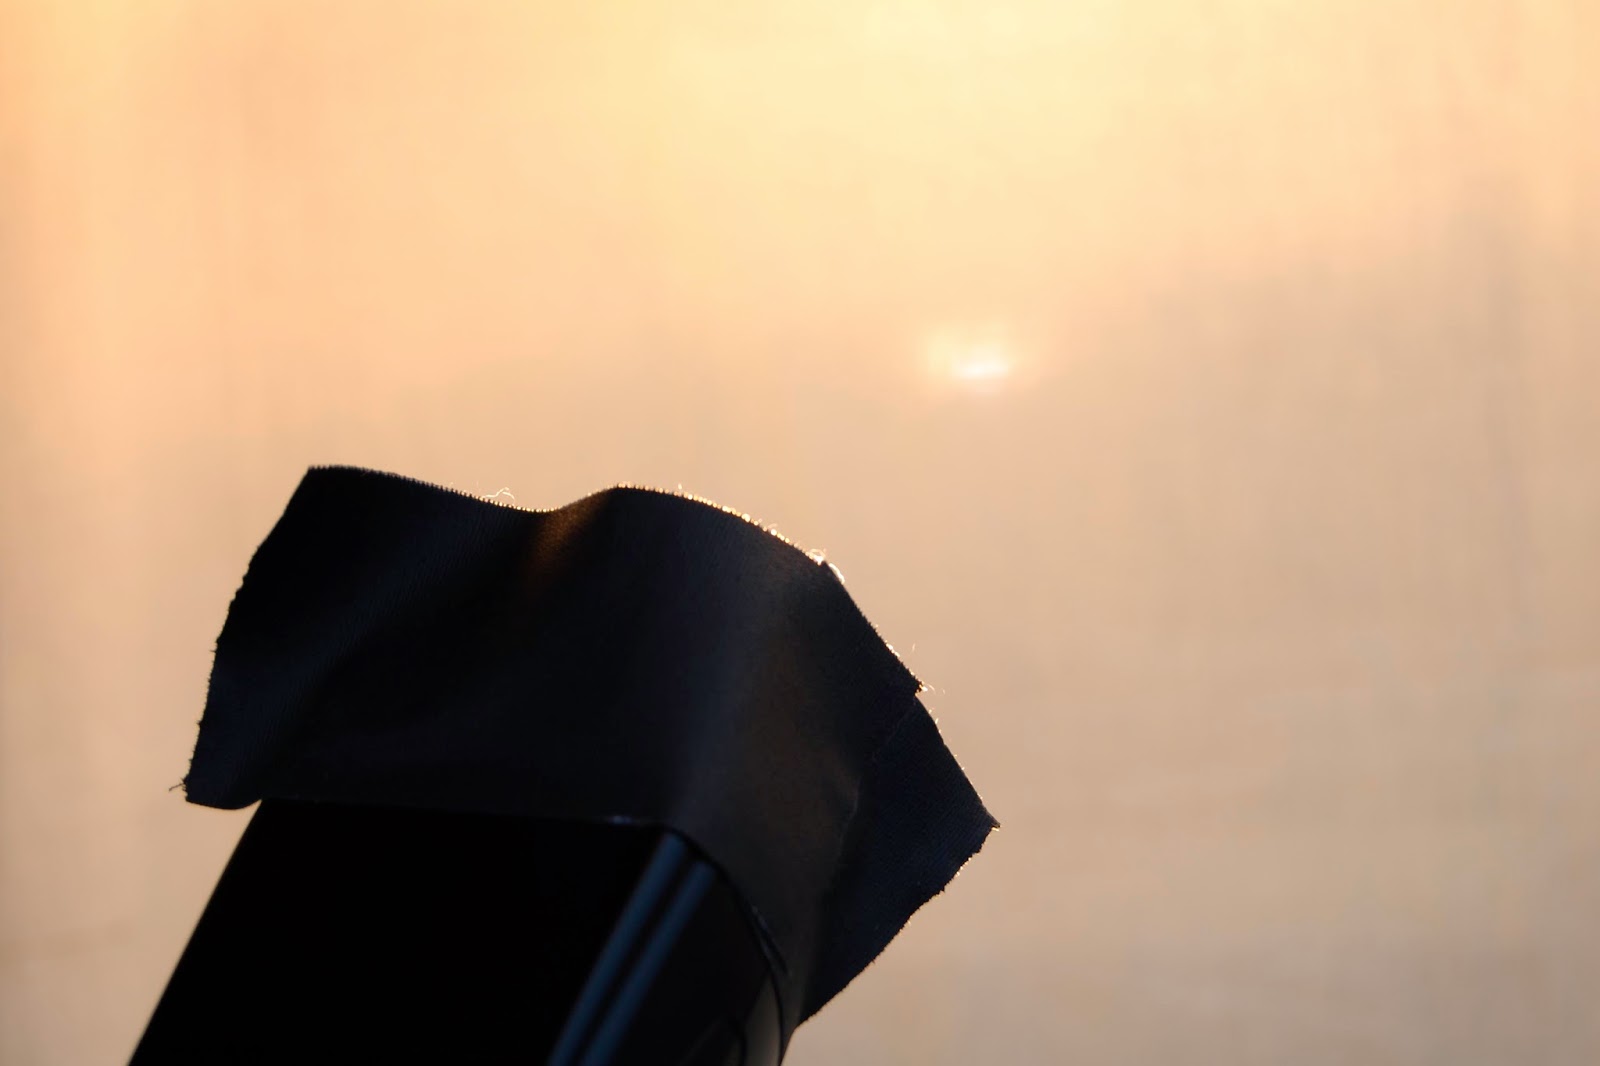
Photo #7
The havoc caused by light leaks, along with the gaffer tape gobo remedy, we in part inspired by Joe McNally. The normal response might be, "That little bit of light won't make any difference to the final image." Maybe so, but hard light, like the wink of light from an infra red trigger, can create tiny, annoying highlights that may just appear where you least expect them.

This choosing of complimentary white balance settings and flash mounted filters and gels can be carried even further. Cokin, the filter people, once made complimentary flash/camera filters combinations to create some "far out" color effects. I've never seen such a pair for sale, but found them in a product list of a 20 year old filter set found in a second hand store. And photographer and impresario Gary Fong crated a You Tube video on using  his Collapsible Cloud Dome and the accessory filter set to create some startling effects.

With one last look at our hero, I leave you with some advice. Photoshop could probably be used to simulate these lighting effects, but more consistent results can be achieved when doing it "in camera". With careful planning and a judicious use of your camera's white balance settings and the two gel filters you should have gotten with your Nikon speedlight, you can go a long way in creating images that will inspire questions like, "How did you do that?" Granted, blue skies are not that unusual, but it does have an ethereal feeling, even if the subject does not.

Sunday, November 16, 2014

Infrared Flash Triggers

Photo #1
Long Ago, In A Galaxy Far, Far Away...Optical slaves triggered by Infra Red (IR) triggers were the working person's answer to trigger multiple flashes. The "slaves" were photo sensitive devices that connected to flash via the hot shoe, an auxiliary PC connector (Nikon), or a dedicated interface (Vivitar), and would fire the flash whenever there was a sudden change in the lighting. This could be a camera mounted speedlight which served as the "master". Politically correct photographers replaced the master/slave terminology to controller/remote, but you get the idea. While a standard flash could be used, IR filtered flashes became the better alternative because their output (usually) wasn't bright enough to affect the overall exposure of the photograph.

IR Options: I pulled the following samples from my equipment closet and found, from left to right: The Nikon SG-3 IR (Infra Red) Panel, the Wein Sync-Link Flash Trigger, and the (discontinued) Nikon SB-50 Speedlight with the IR filter Attachment (Photo #1).
  • The Nikon SG-3 slips into the hot shoe and the IR shield flipped down to cover the built-in flash. Synchronization speed is limited by the camera, so Nikon D70 users top out at 1/500 of a second.
  • The Wein Sync-Link acts like a tiny speedlight (it takes only two AA batteries) and because it does not have the Speedlight Present (SP)contact, it will fire at any speed. I've done some samples at 1/4000 of a second where the limiting factor was the remote speedlight's flash duration, and not that of the Sync-Link itself. And because it functions like a tiny flash, it is subject to lengthening recycle times as the two AA batteries start to lose their juice.
  • The Nikon SB-50 comes with a detachable Infra Red panel that blocks most of the visible light, leaving a red wavelengths to trigger the remote flash units. When used with the MPEX Universal Translator, one could theoretically access any reasonable shutter speed. However, I noticed that the light fell off severely at speeds higher than 1/800 of a second, so I'd consider that the practical synchronization ceiling. Unlike the other two options, the flash head can be rotated to a straight up position, which could be an advantage if you have a ceiling to bounce from. Also, when the SB-50 is set to manual, it delivers a full dollop of light, resulting in depleted CR-123 batteries and increased recycle time, like it or not.
Photo #2
For this post, I started by making a series of selfies: first without glasses, and then with them. I used a Nikon D70 with the shutter speed set to 1/2000 of a second and an aperture of F 5.0 (Photo #2). The initial setup was with a Nikon SB-26 aimed toward the ceiling. A second light, a Nikon SB-800 directed towards some reflective foil placed on the floor, provided the fill from below. Both speedlights were set to the built-in SU-4 (optical slave) mode, and positioned in locations that were far away from the lens axis, resulting in a of photos with no glare. This first shot illustrates some rather deep shadows beneath the nose and chin, but you can see in a cropped closeup that there is indeed a catchlight. Of course, I look like I could use some sleep!

Photo #3
Glare spots on glasses are caused by light reflecting off the glass and into the lens. If you can position your light sources away from the lens axis you can eliminate, or at least minimize, any light bounce-back. This high light placement (overhead ceiling bounce) simulates the sort of light that might come from skylights in a large building, while the catchlights  suggest a shiny floor covering (Photo #3). You may notice a tiny red dot above my left eye. I'll get to that later.

Photo #4
This cropping from the first image (Photo #4) shows the catchlight from the light bouncing off of a piece of foil placed on the floor. You'll notice that it isn't a point light source, but rather a large shiny spot. The foil covered about three square feet. Had the reflector been larger and/or closer to my eyes, the catchlight would have been much larger.

Photo #5
There is one problem when using any of these IR triggers. Since the "master" light is usually aimed along the lens axis, there will be a reflection when you photograph shiny objects. While not visible in the selfie sans lunettes, it can be clearly seen in this shot (Photo #5, arrow). Sure, you can easily clone the spot out in post production, but you'll need to examine each image carefully, as glare spots may appear in parts of the photo you might have overlooked. You might be able to avoid this by using the SB-50 and pointing the head upwards, but that won't do much good if you're photographing outdoors.

Choices: So here are three available options. The cheapest is the Nikon SG-3, so long as you remember to configure your built-in flash to full manual output. Nikon D70 users will be limited to the native (1/500) top sync speed. The Wein Sync-Link is the most versatile, syncing at any speed. The SB-50 is comparable to the Wein, but I can be recommended its use if you already have (or can borrow) one along with its original IR filter. You will be stuck with 1/500 of a second unless you use a workaround of some sort. I certainly wouldn't recommend buying one because I don't think it's a particularly useful flash for the money.

Some Important Considerations: When going with the optical option, your carefully adjusted multi-speedlight setup can be triggered by any flash in the neighborhood, including those from cell phone cameras and point and shoots. This can drive you crazy in small rooms with lots of other cameras. In these environments radio controllers, or the Nikon iTTL Creative Lighting System commander options, work much better.


Power And Range: While I can't trigger a remote speedlight on Molokai (the earth's curvature gets in the way!) these IR units can be used a fair distances outdoors. For an informal test, I set up an SB-800 in the SU-4 mode on a lightstand in our outdoor parking lot. I set up three Nikon D70s, each with one of the three IR triggering options. On a cloudy bright morning, I was able to trigger the SB-800 at a distance of 25 feet using the SG-3 and the built-in flash, while the Wein and the SB-50 successfully triggered the flash at a distance of 35. Since the slaves respond to the sudden change in ambient light, they would become less sensitive in brighter lighting environments and more so in darker venues, allowing for decreased and increased working distances between the triggers and the remote flashes, respectively.

Photo #6
The MPEX Translator Hack Outdoors: I digress: For a final selfie, I put a 24mm prime lens on a D70 body, set the white balance to daylight and screwed a 30 Magenta filter onto the lens. An MPEX Translator and a 1/2 power manual Nikon SB-800 were mounted on the camera  and pointed away from me and toward the key light and would serve as my triggering flash. This combination gave me the all-speeds synchronization flexibility I would need. Key light was a Nikon SB-700 with a full green (fluorescent) filter attached and set to 1/2 power. The sky, tinted by the 30 M filter, took on a distinctive glow, while the speedlight with full green filter complimented the 30M filter on the lens to give the flash-lit foreground a normal color balance. Exposure information: Shutter set to 1/800th of a second, aperture set to  F 5.6, ISO at 200,  Daylight white balance preset with a 30 Magenta Filter mounted on the lens. The flash was clipped to a handy street sign using a Justin Clamp. The whole filter / white balance thing was a Joe McNally trick, dating back to his film days. I was pleasantly surprised (Photo #6) by the results!

Sunday, November 9, 2014

MPEX Translator Synchronization Boosting Hack*

Photo #1
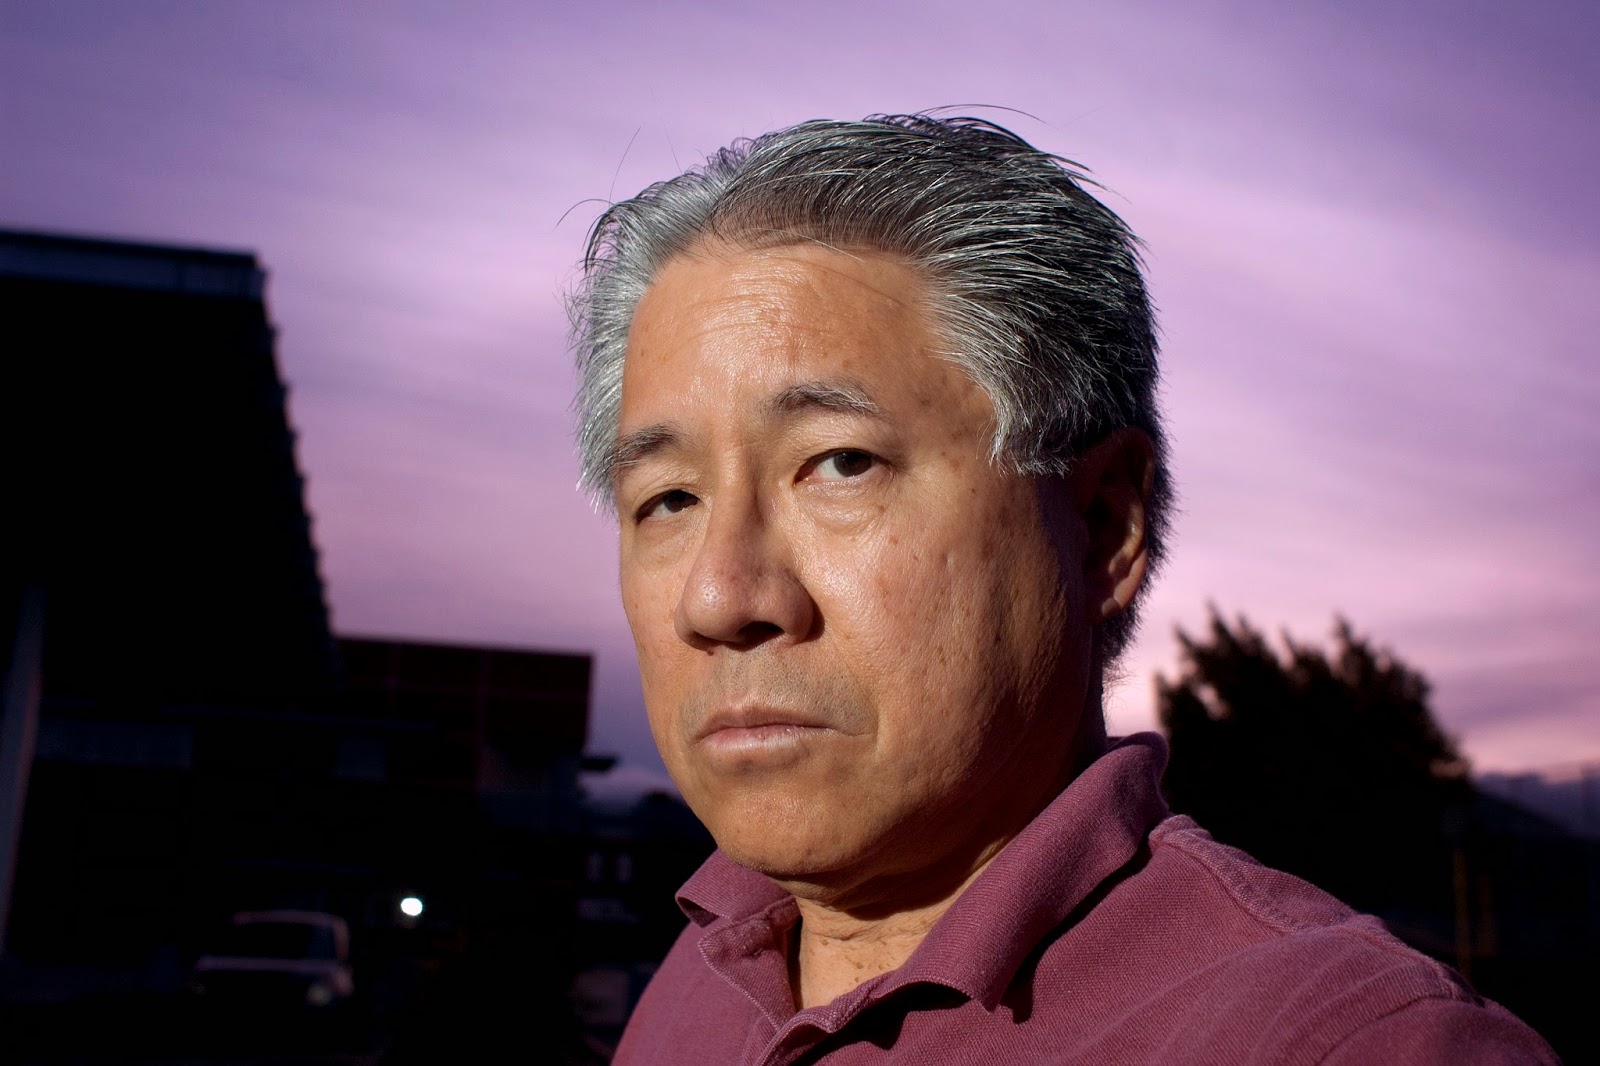
I'll bet this photo (Photo #1) got your attention. I added the black bar is because I'm tired of looking at myself. And if I feel that way now, you must have reached that point of saturation many years ago.

Today's post is about getting the most from a single, battery powered speedlight or flash. When working outdoors you must often compete with high levels of ambient light, which means that you'll need to push a lot of light onto your subject if you expect to subjugate that pesky sunlight. In past photos, I might use a flash with a light output nearly triple that of a shoe-mounted speedlight. But by keeping a spare Nikon body capable of conventional flash synchronization at short, and super-short, exposure times, you can get a leg up when wrestling with the sun for a proper exposure.

I normally carry a Nikon SB-800 speedlight as part of my weekend Nikon D70 kit. While the convenience of iTTL (intelligent Through The Lens) metering at 1/500 of a second can be a joy beyond words, that shutter speed setting, while a full stop better than nearly all of the other Nikon DSLR bodies, is something of a short leash so far as flash is concerned. As I mentioned in earlier posts, I absolutely love the D70's ability to sync at all shutter speeds. Unfortunately, when the SB-800 is mounted in the camera's hot shoe, the top sync speed is 1/500 of a second, the maximum sync speed where the D70 supports iTTL. This is not true for nearly all other Nikon bodies which sync at 1/250 of a second, or lower. If I'm going to make up for the power limitations posed by a single speedlight, I'll need some way to work around this limitation. By using way short exposure times, the corresponding aperture gets larger and larger, allowing for one flash to have a greater influence on the foreground exposure.


Here's the deal. During the evolution of TTL metering, contacts were added to the flash foot (feet?) and the hot shoe to facilitate communication between the two parties. For the super-syncing D70 owner, one of these contacts will prevent you from syncing Nikon speedlights past 1/500 of a second. It's the  Speedlight Present (SP) contact, shown here in a screen shot from , that's the culprit. Disable that contact, and you can sync at all speeds. To see the original image, go to:


There are several ways this can be done. All will involve some sort of adapter placed between the hot shoe and the flash. Some possible solutions would be:
  • A Nikon AS-10 adapter and a PC male/male cable which allows you to bypass the flash foot altogether and interface with the PC connector on the side of the SB-800 (and 900, 910 and SB-24, SB-25, SB-26,and the SB-80), a mechanically "busy" attachment, at best;
  • A Nikon SC-17 flash extension cable with all of the pins deactivated except for the central trigger contact. Click here to read David Hobby's original article, or you can
  • Tape the contact. Take a tiny piece of electrician's tape and cover the SP contact. Not one of my faves.
Photo #2
I'm always on the lookout for any modification that can simplify my photographic efforts. My newest work-around involves an MPEX Universal Translator, described in this Strobist posting. The Translator is primarily used to join a camera and an off-camera speedlight using either a 3.5mm mini-microphone cable or a standard PC connector, the former being significantly cheaper and more reliable than the latter. In actual use, you simply buy two Translators: one for the camera and one for the flash, and a male-male 3.5mm microphone cable in a length you can handle, or just buy the starter kit here.

If you look at Photo #2, you can see that the Translator is installed between the speedlight and the hot-shoe (see arrow). Be sure that you tighten the retaining screw on the Translator and flip the lock lever (or tighten the speedlight's retaining screw) to minimize slippage. But be very careful, just the same. 

One reminder: to connect the translators or the translator and an off-camera LumoPro, you'll need a 3.5mm Miniphone male-male cable (included in said kit), and a male-female "extension" cable in any length you can stand.

Photo #3: ISO 200, 1/4000 second, F 4.5, bounced flash
Now here's the cool part. The Translator does NOT have an SP contact. This means that it can fire a flash, but not much else. Now when my shoe-mounted SB-800 tries to tell the camera body, "I'm here! I'm here!" nobody's listening. When the Translator sits between the hot shoe and the flash foot the D70 body can sync at any speed you wish, provided that the selected exposure time is longer than the flash output.

This screen capture from a Nikon D40 shows a sample selfie (Photo #3) taken indoors using a SB-800 set to 1/8 power, a beam spread of 105mm, and aimed at the juncture of back wall and the ceiling. It could have been made with any flash or speedlight with a light "burst" duration of less than the exposure time. And while this particular shot was made with a Nikon D40, it could have been done with a D70/70s or D50 just as easily. Again, the high speed synchronization speed trick only works with this family of Nikons, although there is one Canon, an early 1D series, that allows similar high speed synchronization. I know this doesn't illustrate the outdoor potential of the flash, but illustrates that you can use this technique to get shots you might have thought impossible without a very VERY powerful flash.

One other thing: If you have a speedlight in the Translator's hot shoe, there's no reason to not add a second speedlight using the mini-microphone jack and your extension cable.  That's a lot of light to work with when you consider the potential for short exposure times (or high synchronization speeds) and fairly large, open apertures. 

Installing the Translator is just a convenient way of accessing those super sync speeds when on-camera flash is required and your using a iTTL Nikon speedlight. I am not advocating direct flash. Quite the contrary, this trick simply allows you a bit more exposure flexibility when using bounce flash. Sure, you give up the exposure automation, but gain a lot of exposure options past 1/500th of a second. Incidentally, I leave it to you to be more creative when using this "hack" than I was.

Warning: If your speedlight has a Standby (power-save) mode, be sure to set it to OFF. If the flash goes to sleep between shots, the camera can't send a "wake up" call through the SP contact. This gambit helps a bit, but you may be forced to do an "off-on" sequence to get the ball rolling once again.The only 100% reliable units have been those units that have only the trigger contact, and nothing else. Of course, these units wouldn't need the Translator hack anyway. 

Amendment: November 17. The Nikon SB-24 does have the SP contact, but an analog Standby (power saver) setting. When set to the conventional "on" position, the unit, coupled to the MPEX Translator, worked every time. I surmise that the Nikon SB-26, my favorite pre-iTTL speedlights, will function in the same manner.

*I use the word "hack" to mean, "an action that gives capabilities to a device unintended by its designer". I feel the word is correctly used in this case. I'm sure others won't agree.

Sunday, November 2, 2014

Happy Halloween!

Not a major post, but a fun one.

My friend Cindi (she's the one with the Marge Simpson hair) at Borel Hair Care asked if I would make a photo of all of the stylists on Halloween. I guess the theme could have been "Scary Hair", as every one of them was "Trick Or Treat" ready. I knew I would have only had only a few minutes to make the shot, so I kept things as simple as I could. 

Since I would be working in a public thoroughfare, I knew I couldn't have a light stand, so I opted to mount my speedlight on a monopod, as I usually do. When it came time to shoot, all I would simply raise the monopod/speedlight combo over my head and shoot away. I chose this particular spot because it had stairs, and the salon's sign high above. I could have played with my vantage point the get the sign closer, or larger, but as it turned out, this particular composition worked out well. Besides, time would be tight.

As soon as my talent started filing out of the salon, I began arranging them. Again, there really wasn't enough time to fine tune the composition, so I basically grouped them by size. Two talls in the front, two mediums on the second stair, and my three petites at the top level. What I didn't plan on was how easy it would be to stagger their positions so I could show off most of their costumes. And while I didn't get every left-to-right detail on all of my subjects (one stylist move slightly out of place), you can certainly see enough to get a good idea of how each costumes looked.

One could argue that it would have looked better if the petites and the talls were reversed, and that the black costumes got lost in the darkened hallway behind them. However, symmetry trumps trickery, and for the most part, a well balanced photo will always play well. Yes, I could have added another speedlight or two with Halloween orange gels, but there wasn't any time to get creative and it could have resumed raining at any moment. Quick and simple, everyone was please with the results.

Runnin' and Gunnin' at it's best!